Heating Home Comfort: Why Oil Still Matters in the Northeast

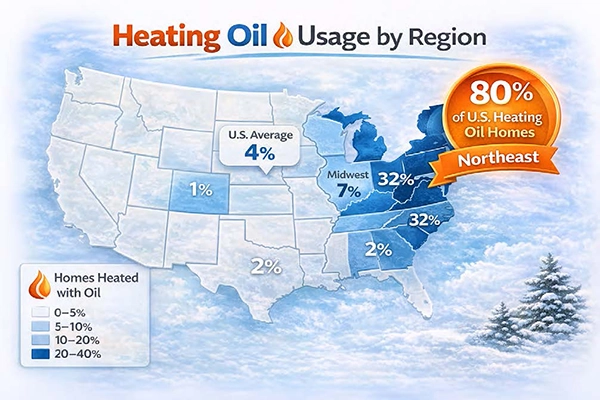
In the Northeast, home comfort looks a little different — because nearly one in three homes still relies on heating oil to stay warm in winter. While the national average sits around 4%, our region accounts for more than 80% of all U.S. heating oil households.

That’s not a coincidence. It reflects our climate, our housing stock, and the reality of long, cold winters that demand dependable heat.

A Regional Energy Story

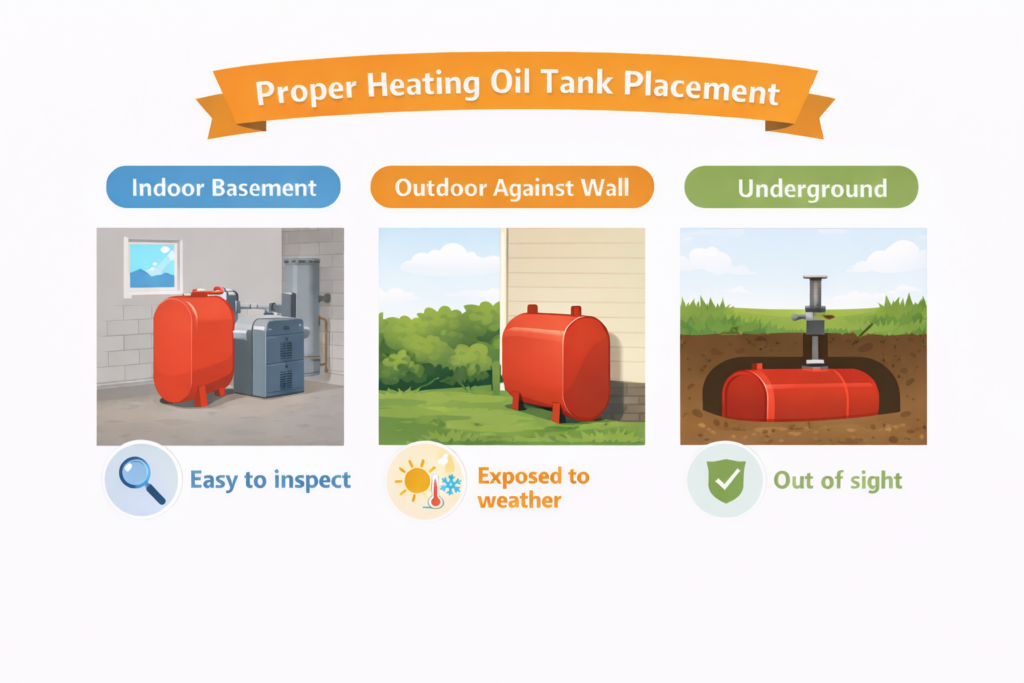
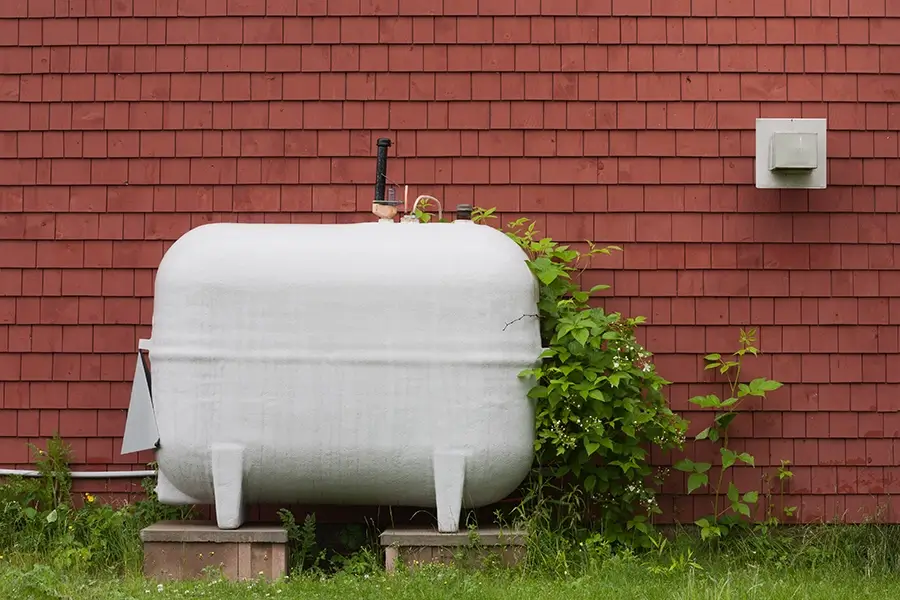
Across New England, New York, and parts of the Mid-Atlantic, heating oil remains a practical and proven solution. Many homes — especially older or rural properties — weren’t designed for pipeline gas or all-electric systems. Heating oil continues to deliver reliable, high-output heat where it’s needed most.

Reliability When It Matters Most

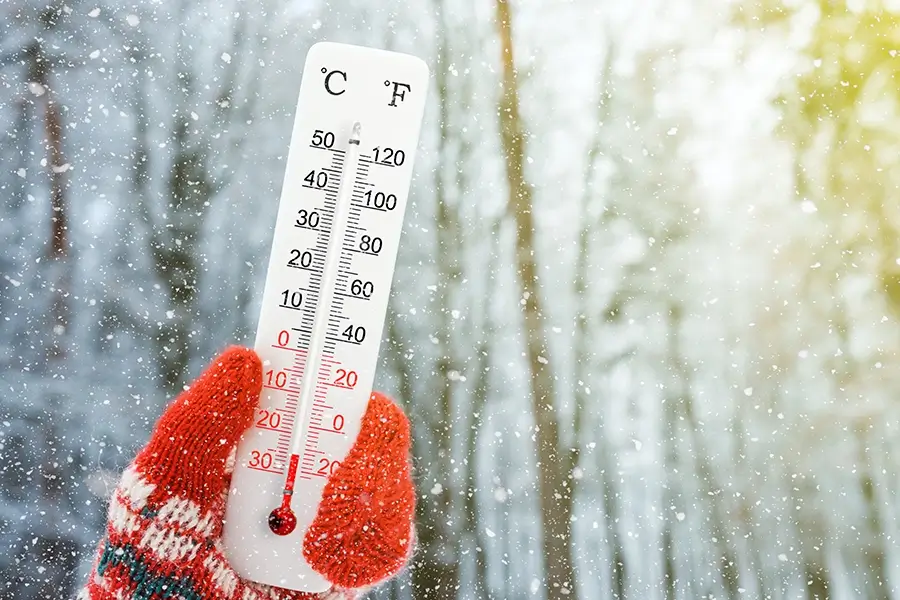
Heating oil’s staying power in the Northeast comes down to control and performance in extreme cold.

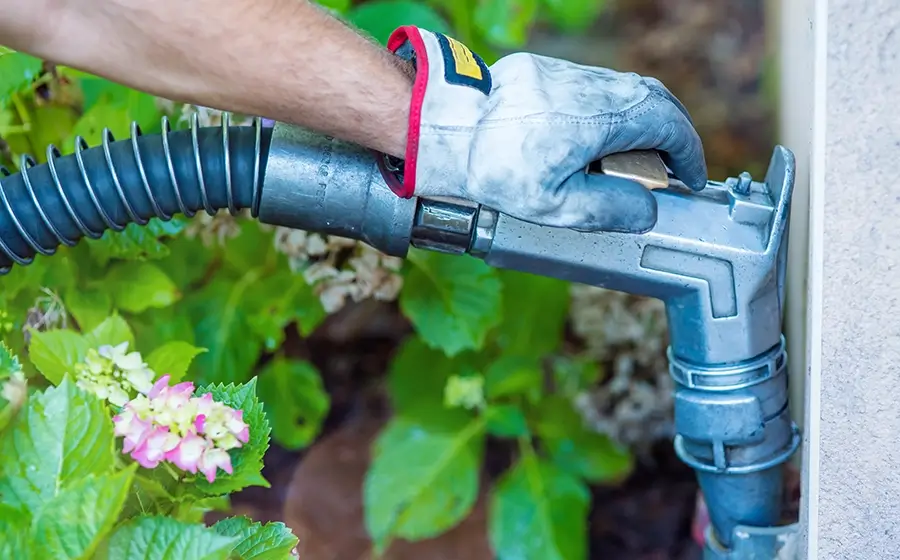
With on-site fuel storage, homeowners aren’t dependent on pipelines or vulnerable to supply interruptions during peak demand or winter storms. When temperatures plunge, oil-fired systems deliver consistent heat — even in conditions that may strain other energy sources.

“When winter hits hard, you want a heating system you can count on — and for many
families, heating oil has proven itself year after year.”

Oil Heat + Heat Pumps: A Smart Combination for Northeast Homes

More homeowners are discovering that oil heat and heat pumps work exceptionally well together — especially in challenging winter climates.

Heat pumps offer excellent efficiency during much of the year, particularly in mild and moderate temperatures. During extended periods of extreme cold, their efficiency can decline, and supplemental heat is often needed. Oil heating systems provide steady, reliable warmth even in the coldest conditions, making them an ideal partner for winter comfort in the Northeast.

This hybrid approach offers:

  • Maximum efficiency during moderate temperatures
  • Strong, dependable heat during extreme cold
  • Reduced wear on both systems
  • Added protection during prolonged cold snaps

Rather than replacing oil heat, heat pumps enhance overall comfort and flexibility, giving
homeowners the best of both worlds.

Looking Ahead to Next Winter

As warmer weather arrives, it’s the perfect time to review how your heating system performed last winter — and consider ways to improve comfort and efficiency. At HOP Energy, we help homeowners plan ahead with:
  • Service and maintenance plans
  • Prebuy-fuel plans
  • Automatic fuel delivery
  • Guidance on installing a new efficient heating / HVAC system
Because in the Northeast, staying warm isn’t optional — and reliable heat still matters.

Plan Early. Stay Comfortable.

Don’t wait for the first cold snap. Schedule your heating oil delivery or service early to avoid winter rush pricing and ensure your home is ready for whatever winter brings.

Above-Ground vs Underground Heating Oil Tanks

Which One Is Right For Your Home?

Whether you’re buying a new home, replacing an aging heating oil tank, or planning a new installation, one of the first decisions you’ll face is whether to go with an above-ground or underground oil tank.

This choice isn’t just about aesthetics—it affects costs, maintenance, safety, environmental risks, and long-term reliability. For homeowners in the Northeast, where winters are harsh and local regulations are strict, understanding the differences between these tank types is essential.

Choosing the right tank can protect your home, save money over time, and ensure compliance with environmental laws. Let’s break down everything you need to know.

Understanding Heating Oil Tank Types

Above-Ground Oil Tanks

Above-ground tanks are typically installed inside basements, garages, or utility rooms, but they can also be placed outdoors along a home’s exterior wall. Most residential above-ground tanks hold between 275 and 400 gallons, enough for standard Northeast homes. These tanks are popular because they are easy to install, easy to inspect, and simpler to maintain. Their visibility makes it easier for homeowners and technicians to spot early signs of corrosion, leaks, or other issues.

Underground Oil Tanks

Underground tanks are buried beneath the ground and usually have a larger capacity, up to 1,000 gallons for residential use. They were commonly installed in homes built in the 1960s through the 1980s. Underground tanks preserve yard space and curb appeal, but accessing them for tank maintenance or repairs is more difficult and costly. Detecting leaks early is challenging, and undetected leaks can result in expensive environmental cleanup.

Side-by-Side Comparison: Above-Ground vs Underground Tanks

Feature Above-Ground Tank Underground Tank
Installation Cost $1,500 – $3,000 $3,500 – $6,000+
Typical Capacity 275–400 gallons 500–1,000+ gallons
Installation Time ~Half-day Multiple days (excavation required)
Maintenance Ease Easy, visible for inspection Harder, requires excavation
Leak Detection Quick, early detection Hidden, costly if leaks occur
Weather Exposure Exposed if outdoor Protected underground
Aesthetic Impact May affect curb appeal Out of sight, preserves landscaping
Longevity 15–20 years (steel/fiberglass) 10–15 years (steel/fiberglass, soil contact)
Regulatory Restrictions Generally allowed Many municipalities prohibit new installation
Environmental Risk Low if leaks detected early High, costly cleanup if undetected
Space Requirements Takes indoor/yard space Preserves indoor/outdoor space

Placement Options for Above-Ground Tanks

Above-ground tanks offer flexibility in placement, but each option has trade-offs:

  • Indoor Placement: Basements, garages, or utility rooms provide protection from weather and temperature extremes. The downside is that the tank occupies valuable indoor space and may require adjustments to fit equipment and access areas.


  • Outdoor Placement: Outdoor tanks free up indoor space and are easier to install in certain properties. However, they are exposed to snow, ice, and freezing temperatures, which can reduce lifespan if not properly insulated or protected.

Pros and Cons of Above-Ground Heating Oil Tanks

Advantages

  1. Lower Installation Costs and Faster Setup: Installation typically takes a half-day, as no excavation is required. Upfront costs generally range from $1,500 to $3,000, depending on size and placement.
  2. Ease of Inspection and Maintenance: Because the tank is visible, homeowners can spot rust, corrosion, or leaks early. Regular inspections prevent minor issues from becoming major environmental hazards.
  3. Simplified Repairs: Repairs are generally quicker and less expensive because technicians can access the tank without excavation equipment.
  4. Compliance with Local Codes: Many Northeast municipalities now prohibit new underground tank installations, making above-ground tanks the primary choice for replacements or new installations.

Disadvantages

  1. Weather Exposure: Outdoor tanks face harsh winters, including snow, ice, freezing temperatures, and strong winds. Indoor placement mitigates this, but space constraints may limit options.
  2. Aesthetic Concerns: Above-ground tanks are visible and may affect curb appeal or landscaping design.
  3. Space Requirements: Indoor tanks occupy basement or garage space; outdoor tanks take up yard area.
  4. Slightly Higher Theft Risk: Accessible tanks are more vulnerable to fuel theft, though this is relatively uncommon.

Key Factors to Consider When Choosing a Tank

  1. Property Layout and Space: Evaluate your indoor and outdoor spaces, including basements, garages, and yard areas. Placement must allow easy access for heating oil delivery and maintenance.
  2. Local Building Codes and Permits: Check municipal requirements. Many Northeast towns ban new underground tanks, and permits are usually required for both types.
  3. Budget:
    • Above-ground installation: $1,500–$3,000
    • Underground installation: $3,500–$6,000+
    • Maintenance and inspection: Underground tanks are more expensive to service.
    • Potential cleanup liability: Underground leaks can be catastrophic; above-ground leaks are easier and cheaper to catch early.
  4. Tank Material:
    • Steel: Durable, but can rust; lifespan ~15–20 years above-ground, shorter underground.
    • Fiberglass: Resistant to corrosion, longer lifespan, higher upfront cost.
    • Double-Walled: Extra layer of protection; increasingly required by municipalities.
  5. Environmental & Safety Concerns: Regular inspections are essential. Homeowners are liable for environmental cleanup, regardless of tank age. Insurance may impose requirements or higher premiums for underground tanks.
  6. Home Age and Existing Infrastructure: Homes built pre-1990s likely have underground tanks. Tanks over 15–20 years old should be evaluated for replacement.

Tank Capacity Guide

The size of your residential oil tank directly affects how often you need deliveries and whether your home’s heating demands are met consistently. Standard above-ground tanks typically range from 275 to 400 gallons, while underground tanks can reach 1,000 gallons or more for large properties.

  • 275-gallon tanks are generally suitable for homes up to 2,000 square feet.
  • 330–400 gallons fit homes between 2,000 and 3,000 square feet.
  • 500–1,000 gallons accommodate large homes or properties with high heating requirements.

Capacity needs depend not just on home size, but also on insulation quality, local climate zone, number of occupants, and overall heating usage patterns. Choosing the right size prevents running out of fuel in the coldest months and avoids unnecessary upfront costs for an oversized tank.

Signs You Need a Tank Replacement

Even well-maintained tanks eventually age out. Key indicators that an oil tank replacement may be necessary include:

  • Tank age over 15–20 years
  • Visible rust, corrosion, or oil stains
  • Leaks or odors around the tank area
  • Dents, cracks, or physical damage
  • Failed integrity tests or non-compliance with local regulations
  • Purchasing a home with an existing underground tank

Underground tanks are especially prone to hidden issues. Leaks may remain undetected, potentially contaminating soil or groundwater. Early detection and replacement help avoid costly environmental cleanup and maintain safe heating operations. Replacing an old or leaky tank will also help lower your heating oil costs

Transitioning from Underground to Above-Ground Tanks

Many homeowners are replacing aging underground tanks with modern above-ground heating oil tanks. This process requires careful planning:

  1. Proper removal or abandonment of the old tank to comply with environmental regulations (read our blog post on how to safely remove an old heating oil tank).
  2. Soil testing and remediation, if necessary, to ensure no contamination remains.
  3. Installation of a new tank, often double-walled for extra safety and leak protection (ROTH is a great brand option).

While the upfront cost of removal and installation may range from $3,500 to $6,000+ for underground tanks and $1,500–$3,000 for above-ground, the benefits are significant. Above-ground tanks allow easier inspections and maintenance, reduce the risk of environmental liability, and comply with most Northeast municipal regulations, which increasingly limit new underground installations.

Tank Material Options

Tank material affects durability, maintenance, and lifespan:

  • Steel Tanks: Durable but susceptible to corrosion, particularly underground. Protective coatings extend life to 15–20 years for above-ground tanks.
  • Fiberglass Tanks: Corrosion-resistant with longer lifespan potential, though typically more expensive upfront.
  • Double-Walled Tanks: Include an inner and outer layer for leak prevention, often required by local codes for new installations (read more about why we recommend upgrading to a double-walled heating oil tank).

Choosing the right material ensures your home heating oil tank lasts longer, reduces the risk of leaks, and aligns with environmental safety standards.

Environmental and Safety Considerations

Safety and environmental responsibility are critical when managing fuel oil tanks:

  • Leak Prevention and Detection: Regular inspections (at least annually for above-ground tanks) and modern leak detection systems for underground tanks help prevent costly spills.
  • Environmental Protection: Homeowners are liable for cleanup if a tank leaks, even if it was installed by a previous owner. Underground leaks can cost $10,000–$50,000+ for soil and groundwater remediation.

Insurance Requirements: Some insurers require double-walled tanks or impose higher premiums for underground tanks due to contamination risk.

Tank Selector Quiz

Take this quick 5-question quiz to see whether an above-ground or underground tank fits your home, budget, and lifestyle best. It only takes a minute, and you’ll get a clear recommendation to help guide your next steps.

Tank Selector Quiz - Hope Energy

Heating Oil Tank Selector Quiz

1. Property type and available space:

2. Budget:

3. Home age:

4. Environmental priorities:

5. Local regulation awareness:


HOP Energy’s Tank Services

HOP Energy provides comprehensive fuel oil tank services across the Northeast, ensuring your tank installation or replacement meets safety, regulatory, and environmental standards. Our services include:

  • Professional tank installations (above-ground and permitted underground tanks)
  • Tank replacements and upgrades
  • Routine inspections and maintenance
  • Environmental compliance guidance

With over 90 years of combined experience and deep knowledge of state-specific regulations, HOP Energy ensures homeowners receive reliable, safe, and compliant solutions. Learn more about our services here: Fuel Oil Tank Services.

Frequently Asked Questions

Which is safer: above-ground or underground oil tanks?

Above-ground tanks are generally safer due to easier leak detection, but both types are safe when properly maintained.

How long do heating oil tanks last?

Above-ground tanks last 15–20 years, while underground tanks typically last 10–15 years, depending on material and soil conditions.

Can I still install an underground oil tank?

Many Northeast municipalities prohibit new underground installations. Existing tanks may be grandfathered, but always verify local codes.

What are double-walled oil tanks?

Double-walled tanks feature two layers to prevent leaks and protect the environment, which is increasingly required by modern regulations.

How much does it cost to remove an underground oil tank?

Removal costs typically range from $1,500–$4,000+, depending on size, location, and contamination levels.

Do I need permits for tank installation?

Yes. Most municipalities require permits for both above-ground and underground tanks.

Can I install an oil tank myself?

DIY installation is strongly discouraged. Professional installation ensures safety, code compliance, and warranty protection.

What happens if my underground tank leaks?

Homeowners are responsible for cleanup, even if the tank was installed by a previous owner. Proper inspections and maintenance are essential.

How often should oil tanks be inspected?

Annual inspections for above-ground tanks are recommended. Underground tanks require more frequent professional assessment if still in use.

Heating Oil Additives: Do They Work and Are They Worth It?

Heating oil additives tend to spark strong opinions. Some homeowners swear by them. Others assume they’re just another upsell—something oil companies push that doesn’t actually do much.

The truth, as usual, lives in the middle. Additives can work, and in the right situations they can absolutely be worth it. But they’re not magic, and they’re not always necessary. This guide breaks down what fuel oil additives actually do, when they help, when they don’t, and how to decide if they make sense for your home.

What Are Heating Oil Additives?

A heating oil additive is a concentrated fuel oil treatment designed to improve the performance, stability, and reliability of home heating oil. These additives are typically poured directly into your oil tank and mix with the fuel as it circulates through your system.

Additives are used to prevent problems like sludge buildup, water contamination, cold-weather gelling, clogged filters, and microbial growth inside the tank. They’re commonly referred to as “heating oil treatment additives,” “fuel oil treatment products,” or “heating oil tank treatments.”

Why Heating Oil Needs Additives

Decades ago, heating oil was more chemically stable. Modern refining processes—while cleaner and more efficient—have removed many of the naturally occurring compounds that once helped fuel resist breakdown.

As a result, today’s home heating oil is:

  • More prone to oxidation, which leads to oil sludge
  • More sensitive to water contamination from condensation
  • Less stable during long storage periods
  • More vulnerable to cold-weather gelling

Add to that the fact that many homes go months between deliveries, and you have fuel sitting in tanks long enough for problems to develop. Heating oil treatments exist to counteract these vulnerabilities.

Not all oil additives do the same thing. The best additive for your home heating oil depends on the specific problem you’re trying to prevent.

Types of Heating Oil Additives

Fuel Stabilizers

These slow down oxidation and chemical breakdown, helping prevent oil sludge formation during storage.

Water Controllers (De-Emulsifiers)

These are a type of heating oil additive to remove water, helping separate water from fuel so it can be filtered out instead of circulating through your system.

Important note: Alcohol-based additives don’t “remove” water—they suspend it, which can sometimes make corrosion worse. Modern de-emulsifiers are generally preferred.

Line Cleaners & Detergents

These help dissolve existing deposits in fuel lines, filters, and nozzles. They’re often used as part of a heating oil sludge treatment.

Biocides

Microbes can grow where oil and water meet. Biocides kill bacteria and fungi that contribute to sludge and corrosion inside tanks.

Anti-Gel Additives

A heating oil anti-gel additive lowers the temperature at which wax crystals form, helping prevent gelling and freezing in cold weather.

How Do Heating Oil Additives Work?

Additives for heating oil work at a molecular level inside the fuel itself, improving how it’s stored, transported, and burned rather than changing your equipment.

Fuel Stabilization

Fuel stabilizers slow oxidation—the reaction between heating oil and oxygen that causes breakdown and oil sludge. By interrupting this process, stabilizers keep heating oil cleaner during long storage periods.

Cold-Weather Flow Protection (Anti-Gel)

Heating oil contains wax molecules that crystallize and clump in cold temperatures, restricting fuel flow. Anti-gel additives modify wax crystals so they stay small enough to pass through fuel lines and filters, preventing gelling and freezing.

Water Control and Separation

Water-controlling additives force water to separate from fuel instead of remaining suspended. Once separated, water can be captured by filters or removed during service, reducing corrosion, microbial growth, and combustion problems.

What Additives Don't Do

Heating oil additives are preventive—not corrective. They won’t repair mechanical failures, remove large amounts of standing water, or fix severely contaminated tanks. Think of them as preventive maintenance for your fuel itself, not a repair tool.

Common Problems Additives Can Solve

When properly matched to the problem, additives can help prevent:

  • Oil sludge buildup in tanks and filters
  • Water contamination from condensation
  • Clogged nozzles and filters
  • Cold-weather gelling or freezing
  • Bacterial and fungal growth inside tanks

They are especially useful for homes with older tanks, infrequent deliveries, or past sludge issues.

Do Heating Oil Additives Actually Work?

Yes—but with limits.

Heating oil additives are widely used across the fuel industry, including in commercial, industrial, and marine applications. When used correctly, they’ve been shown to reduce sludge formation, improve cold flow properties, and extend the usable life of stored fuel.

What they don’t do:

  • Fix severely contaminated tanks
  • Remove large amounts of standing water
  • Repair mechanical issues in burners or pumps

Additives work best before problems occur, not after a system is already failing.

Are They Worth the Cost?

Consider using additives in these situations:

  • Cold climates: If winter temperatures regularly drop below 20°F, a heating oil additive to prevent gelling should be standard practice, especially with above-ground tanks.
  • Summer fill-ups: When oil will sit for months, use a stabilizer to prevent warm-weather degradation.
  • After tank cleaning or new deliveries: Add treatment to fresh fuel to protect it from day one.
  • Performance issues: If you’re experiencing frequent filter changes, sooting, or efficiency loss, additives can help clean the system while you address underlying problems.
  • Water contamination: If you see signs of water (filter rust, corrosion, biological growth), water-controlling additives help manage ongoing condensation.
  • Older tanks with sludge history: Regular use of cleaning additives can gradually reduce buildup—though severe contamination requires professional tank cleaning.
  • Vacation homes: Properties with intermittent heating system use benefit from stabilizers that keep fuel fresh during idle periods.

How to Choose the Right Additive

Match the additive to your specific problem. For cold weather gelling, choose an anti-gel formula; for year-round protection, select a multi-function product addressing stability, water, and cleaning.

Check the treatment rate—some products treat 80 gallons per ounce, others 150. Calculate cost per gallon treated for best value.

Look for proven chemistry from established manufacturers; industrial and home heating oil additives often share reliable formulations.

Verify compatibility with No. 2 fuel oil used in residential heating, as diesel additives may not be optimized.

Consider alcohol content carefully. Small doses can disperse water, but high concentrations may cause corrosion; alcohol-free water dispersants are generally superior.

Read reviews from heating professionals and ask your fuel supplier for recommendations or branded additives they trust.

Pros and Cons of Heating Oil Additives

Pros Cons
• Helps prevent sludge and buildup • Not a fix for severe contamination
• Reduces cold-weather fuel issues • Using the wrong product can be ineffective
• Improves fuel stability • Overuse offers no added benefit
• Low cost compared to repairs • Dosing requires attention

How to Use Fuel Oil Additives Properly

Add before or during fuel delivery. Pour the additive into your tank just before your delivery arrives, or add it to the first 50-100 gallons for thorough mixing.

Use the correct dosage. Follow label instructions precisely. Under-treating is ineffective; over-treating wastes money and may cause problems.

Treat consistently. Additives work best with regular use, not sporadic one-time treatments. Add with each delivery or seasonally.

Calculate for partial fills. Treat only the new fuel, not your total tank capacity.

Store properly. Keep bottles sealed at moderate temperatures. Extreme heat or cold can degrade formulations.

Track results. Watch for improvements—fewer filter changes, better burner performance, less sooting, improved cold-weather startup.

Combine with professional service. Use additives as part of a comprehensive maintenance program that includes annual tune-ups, filter changes, and tank inspections.

HOP Energy’s Recommendations

At HOP Energy, we take a practical, no-hype approach to heating oil additives. We don’t recommend them blindly—and we don’t dismiss them either.

For customers with a history of oil sludge, water issues, or winter gelling, professionally selected fuel oil additives can be a smart preventive step. Combined with reliable heating oil delivery and routine HVAC maintenance, they help protect your equipment and reduce unexpected breakdowns.

If you’re unsure whether additives make sense for your home, our technicians can assess your tank, fuel quality, and heating system and make an honest recommendation. Contact HOP Energy today to discuss your heating oil needs.

Frequently Asked Questions

Do heating oil additives remove all water from my tank?

No. They help manage small amounts of moisture, but standing water must be physically removed.

What is the best heating oil additive?

The best additive depends on your needs. For cold climates, choose anti-gel formulas. For year-round protection, select multi-function products that stabilize fuel, control water, and clean your system.

Can additives fix existing oil sludge?

They can help break down light buildup, but severe sludge requires professional cleaning.

How often should I use a fuel oil additive?

Use additives with each fuel delivery or at minimum once per heating season. For anti-gel protection, treat every winter fill-up below 20°F. For active problems, use more frequently until resolved.

Are heating oil additives safe for my furnace or boiler?

When used as directed and designed for home heating systems, yes, boiler and furnace oil additives are safe.

Do I need additives every year?

Not always. Homes with clean tanks and consistent deliveries may not need annual treatment.

Bottom line: Heating oil additives aren’t snake oil—but they’re not a cure-all either. Used correctly and for the right reasons, they can be a worthwhile investment in keeping your heating system reliable, efficient, and ready for winter.

How to Winterize Your AC Unit

Your air conditioner worked hard all summer keeping your home cool, and now it deserves a little winter vacation. Winterizing your AC unit isn’t complicated, but it is important. A few quick steps can help prevent rust, debris buildup, freezing damage, and surprise repairs when you turn the system back on in spring.

Below, our heating and cooling specialists walk you through how to winterize your AC system, when it actually matters, and a few myths worth clearing up along the way.

How to Winterize Your AC Unit: Step-by-Step

1. Shut Off Power to the Outdoor Condenser

Locate the disconnect box next to your condenser and flip the switch to OFF. This prevents the unit from randomly kicking on during a mild winter day, which can pull in water or snow and cause freezing damage.

2. Clean Off Leaves, Dirt & Debris

Grab a hose (on a warm day) or use a soft brush to clear away:

  • Leaves
  • Sticks
  • Grass clippings
  • Built-up dirt

A clean condenser is less likely to trap moisture or develop rust through the winter.

3. Inspect the Unit for Visible Damage

Look for:

  • Cracked insulation
  • Bent fins
  • Loose panels
  • Rust spots

A quick inspection now helps avoid bigger issues when you start up your system in spring. If anything looks off, HOP can help with AC repairs before winter hits.

4. Insulate Exposed Refrigerant Pipesl

Use foam pipe covers to protect exposed lines from freezing. This is especially important in the Northeast, where winter temperatures can drop fast.

5. Cover the Top (Not the Whole Unit)

This is where homeowners often get mixed advice. 

A full AC cover can trap moisture and invite mold or critters. Instead, use a breathable top-only cover to keep snow and ice from piling directly inside the unit while still allowing airflow.

If your condenser sits under a roof overhang, you may not need a cover at all.

6. Check the Area After Big Storms

Every few weeks, especially after a nor’easter, brush off heavy snow buildup. You don’t need to baby the unit; just keep it from being buried under a winter’s worth of slush.

Do AC Units Need to Be Winterized?

Short answer: Not always — but in cold climates, yes.

Your AC system is designed to live outdoors. It can handle rain, snow, and temperature swings. But winterizing helps prevent:

  • Ice buildup
  • Cracked insulation
  • Rodent nesting
  • Corrosion
  • Spring startup issues

What About Heat Pumps?

Note that if you use a heat pump, this article isn’t for you. Heat pumps run year-round and should not be covered or shut off. Learn more about heat pumps here: How to Use a Heat Pump to Supplement Your Whole Home Heating System.

How Do I Prepare My Air Conditioner for Winter?

Here’s the quick checklist homeowners can follow each fall:

  • Turn off the condenser power
  • Remove debris
  • Inspect for damage
  • Insulate exposed pipes
  • Add a top cover
  • Clear snow after storms

You can do it yourself in under 30 minutes, or you can leave it to the pros during your annual HVAC service visit.

What Is the $5000 AC Rule?

The “$5,000 rule” is a guideline used in the HVAC industry to decide whether you should repair or replace an air conditioner.

Here’s how it works:
Age of the system × cost of repair = replacement decision.

If the total is:

  • Under $5,000: Repair is usually worth it.
  • Over $5,000: Replacement may be the smarter investment.

Example:
A 12-year-old AC with a $600 repair estimate: 12 × $600 = $7,200

That’s over the threshold, so replacement is often more cost-effective.

If you’re ever unsure, HOP’s technicians can evaluate your system and give you a clear recommendation. 

FAQs

You can, but you shouldn't. Even brand-new units benefit from basic winter prep to prevent premature wear.

No. Full covers trap moisture and encourage rodent nesting. A top-only cover is best.

Once the condenser is shut off, keep it off until spring. Running AC in freezing conditions can cause damage.

Some manufacturer warranties require regular system maintenance. Keeping your AC clean and protected can help keep your warranty valid.

Besides prepping your AC unit for cold weather, winterizing your HVAC system should also include prepping and testing your heating system. This means replacing the furnace filter, testing the heat, and scheduling a tune-up to check burners, safety controls, and overall performance.

No, heat pumps operate in winter. Do not shut off or cover a heat pump.

The Bottom Line on Winterizing Your AC Unit

Winterizing your AC is one of the simplest ways to protect your system, reduce wear, and make sure everything starts smoothly when warm weather returns. A few quick steps in the fall can help you avoid repairs, extend your system’s lifespan, and keep your HVAC system running efficiently year after year. 

For additional system care, you can also check out our HVAC maintenance services or contact us to schedule a tune-up.

How to Prevent Heating Oil From Gelling in Cold Weather

If you live in the Northeast, you already know winter doesn’t play nice. And while your heating system can handle the chill, your heating oil isn’t quite as tough. When temperatures drop, heating oil can gel, or even “freeze,” leading to clogs, system shutdowns, and some very unwelcome chills indoors.

Here’s how to keep your heating oil flowing so your home stays cozy all winter long.

Q: What Is Heating Oil Gelling?

A: Heating oil gelling happens when the paraffin wax naturally found in home heating oil begins to solidify as temperatures fall. Once this wax thickens, it can clog filters, lines, and nozzles, preventing your system from getting the fuel it needs.

When there is oil gelling, you might notice your furnace struggling to start, short-cycling, or shutting down entirely. None of these are things you want to troubleshoot in sub-zero weather, which is why prevention is key.

Q: What Temperature Does Home Heating Oil Gel?

A: Typically, No. 2 home heating oil starts to gel at around 15°F to 20°F. But the exact temperature can vary based on the oil blend, storage conditions, and your heating oil tank setup. If your tank is outdoors or above ground, it’s far more vulnerable than one in a basement or sheltered area.

Some homeowners in colder regions use a blended fuel, mixing No. 2 heating oil with No. 1 kerosene, which has a lower freezing point and helps prevent gelling naturally.

Q: How to Keep Heating Oil From Gelling?

A: You don’t have to wait for a blizzard to protect your heating oil. A few proactive steps can make all the difference:

  1. Add a heating oil anti-gel additive
    Using a heating oil anti-gel additive before temperatures drop is one of the easiest and most effective ways to prevent gelling. These additives lower the oil’s freezing point, improve flow, and help your system run smoothly even in deep winter.
  2. Keep your tank full
    A fuller tank means less empty air space and less condensation. This can lead to water buildup, which is a major culprit in freezing issues. Make sure you top off before the next cold front hits.

  3. Insulate or shelter your oil tank
    If your tank is outdoors, consider adding insulation or a small shelter around it. Even a basic windbreak can help maintain temperature stability.

  4. Schedule regular maintenance
    Annual heating system tune-ups keep your filters clean and your fuel lines clear, reducing the chance that thickened oil will cause blockages. If you want to stay ahead of any heating oil issues, you can purchase a Heating Protection Plan through HOP, which includes routine maintenance for your oil tank system.. 

Q: What Is the Best Anti-Gel Additive for Home Heating Oil?

A: There’s no one-size-fits-all additive, but look for products designed specifically for home heating oil, not diesel or automotive use. A good additive will:

  • Prevent wax crystals from sticking together
  • Reduce water buildup in your tank
  • Improve cold-weather fuel performance

Your HOP Energy technician can recommend and apply a professional-grade additive that’s tested for your system and local climate conditions, no guesswork required.

Q: Can Heating Oil Freeze in the Winter?

A: Technically, heating oil doesn’t “freeze” solid like water. Instead, it thickens and gels, eventually becoming too viscous to pump. Once that happens, your system can’t draw fuel, and you’ll likely need a technician to warm or replace the oil before restarting your burner.

If you ever find your system not running and suspect gelling, don’t try to fix it yourself; call HOP Energy. Our Emergency Services Team will safely diagnose the issue and get your heat back on fast.

Stay Ahead of Winter With HOP Energy

Cold weather can be unpredictable, but your comfort doesn’t have to be. Whether it’s automatic oil delivery, professional tank treatments, or 24/7 emergency service, HOP Energy keeps your system running efficiently year-round.

Contact your local HOP Energy office today to schedule your next heating oil delivery, or even order heating oil online and set up automatic delivery. This way, you can count on a warm and cozy cold season, no matter how low the temperature drops.

Why Upgrading to a Double-Walled Heating Oil Tank Matters

Homeowners across the Northeast rely on heating oil to stay warm through long winters. But while the heating system often gets the attention, the oil tank itself plays just as critical a role. Aging or single-wall tanks can corrode and leak over time, posing environmental hazards and incurring expensive cleanup costs. Upgrading to a double-walled heating oil tank is one of the most effective ways to protect your property, comply with evolving regulations, and ensure long-term heating reliability.

Table of Contents

What is a Double-Walled Heating Oil Tank?

A double-walled heating oil tank features an inner tank (that holds the oil) and an outer shell that serves as secondary containment. The space between the two walls, known as the interstitial space, is designed to contain any leaks or breaches in the inner wall.  

Key mechanics:

  • Inner tank holds the fuel.
  • Outer tank surrounds it, ready to catch any potential leakage from the inner tank.
  • The interstitial space may include leak detection devices (gauges, alarms) and sometimes a “spill bucket.”

Because of this design, the outer shell functions as built-in containment, reducing the need for other external containment measures.

Benefits of Double-Walled Heating Oil Tanks

  • Better leak protection – If the inner tank fails, the outer wall helps prevent fuel from escaping into soil, groundwater, or building interiors.
  • Built-in containment – Some single-wall tanks require additional external containment systems; double-walled units integrate that layer.
  • Durability & peace of mind – Some models use corrosion-resistant materials; fewer worries about seepage or environmental cleanup down the road.
  • Regulatory alignment – Upgrading can help you meet modern standards for fuel storage safety.

What Homeowners Should Do

If your current heating oil tank is more than 15 to 20 years old, showing signs of rust, or made from uncoated steel, it’s worth evaluating replacement options now. When upgrading, ensure the tank is installed on a level base, properly vented, and equipped with a monitoring system for the interstitial space. Homeowners should also review manufacturer specifications, warranty coverage, and insurance requirements, since

The Bottom Line

Switching to a double-walled heating oil tank is about more than hardware — it’s about safety, compliance, and environmental responsibility. With stricter regulations emerging across the Northeast, this upgrade provides peace of mind and future-proofs your home’s heating system. By investing in a tank that meets modern standards, homeowners can reduce risk, simplify compliance, and ensure reliable performance for years to come.

How to Safely Remove an Old Heating Oil Tank

If you’ve recently switched to natural gas, upgraded to a new oil tank, or discovered an unused tank in your basement, you may be wondering what to do next. Old heating oil tanks can be hazardous if left in place too long, and removal isn’t something to DIY.

Here’s everything homeowners should know about oil tank removal, disposal, and how to do it safely.

Table of Contents

Residential Oil Tank Removal

Heating oil tanks can last decades, but corrosion, leaks, and sediment buildup eventually make them unsafe. Even a small leak can contaminate soil or groundwater, leading to costly cleanup and potential environmental fines.

That’s why safe, professional residential tank removal is essential, not only for your property value, but for your peace of mind.

Removing and Disposing of Aboveground Oil Tanks

If your tank is located in a basement, garage, or outside on a stand, you have what’s considered an aboveground oil tank. These are generally the easiest and least expensive to remove.

Here’s what the process typically involves:

  1. Inspection and preparation – The tank is checked for leaks or residue. Any remaining fuel is pumped out and disposed of safely.
  2. Tank removal – Certified technicians disconnect fuel lines, remove the tank, and clean the area.
  3. Transportation and disposal – The tank is transported to a licensed oil tank recycling or disposal facility.

Professional removal ensures all local and environmental regulations are followed, which is something you can’t guarantee with DIY methods.

HOP Energy’s heating oil experts can coordinate safe tank removal or replacement as part of your heating system upgrade.

Removing and Disposing of Underground Oil Tanks

Removing an underground oil tank requires a bit more heavy lifting … literally! These tanks are often buried several feet below ground and may have been abandoned years ago.

The process typically includes:

  • Excavating the tank using specialized equipment
  • Pumping out leftover oil and sludge
  • Cleaning and cutting open the tank for safe disposal or recycling
  • Soil testing to check for contamination

If your underground tank has leaked, your removal contractor can guide you through remediation requirements in your area. HOP Energy partners with licensed specialists to ensure compliance and proper environmental reporting.

How to Dispose of an Oil Tank

Old heating oil tanks can’t be taken to your local dump or recycling center; they require special handling by licensed professionals. 

Even if the tank has already been removed/disconnected, please avoid hauling or cutting the tank yourself. It can contain flammable vapors, oil residue, or rust that poses safety risks. 

Attempting to move or cut a tank yourself is not only dangerous; it may also violate local environmental codes. Instead, hire a professional to dispose of it for you.

Who Takes Old Oil Tanks?

Only certified oil service companies or hazardous waste haulers are authorized to pump out, transport, and dispose of (or recycle) heating oil tanks.

These professionals have the right equipment to safely drain residual oil, clean the tank, and ensure all materials are properly processed. 

If you’re ready to get rid of an unused tank, HOP Energy can connect you with trusted partners who can remove your oil tank safely, efficiently, and in full compliance with environmental standards.

Recycling Old Heating Oil Tanks

Wondering if your tank can be recycled instead of thrown away? The good news is yes — most steel heating oil tanks can be taken to a certified recycling facility once cleaned and drained. The metal is processed and reused, minimizing environmental impact.

Your removal contractor or local HOP Energy office can recommend the nearest licensed recycler in your region.

Can I Leave an Old Oil Tank in My Basement?

You can … but you shouldn’t. While it’s technically legal in some areas to leave an empty tank in place, doing so can create future hazards, including:

  • Hidden leaks or corrosion
  • Odor or vapor buildup
  • Complications during property sales or inspections

If you no longer use oil heat, it’s best to schedule professional removal.

Replacing an Old Oil Tank

If you’re still using heating oil and your tank is nearing the end of its lifespan (typically 15–20 years), replacement may be a smarter option than full removal. Modern tanks are built with corrosion-resistant materials and leak prevention features for added safety.

Learn more about oil tank replacement and upgrades through HOP Energy’s heating oil tank services.

FAQs About Heating Oil Tank Removal

Q. How long does oil tank removal take?
A. Most aboveground removals take just a few hours. Underground tanks can take a day or more depending on accessibility and site conditions.

Q. Do I need a permit to remove an oil tank?
A. In many areas, yes. Your contractor or HOP Energy representative can handle the paperwork for you.

Q. What does oil tank disposal cost?
A. Costs vary based on size, location, and disposal requirements, but aboveground removals/disposals are generally much less expensive than underground ones.

Q. Can HOP Energy remove or replace an oil tank?
A. Absolutely. HOP Energy provides tank inspection, removal, and replacement services across the Northeast, ensuring your system stays safe and compliant year-round.

Trust HOP Energy for Safe Oil Tank Disposal

When it’s time to retire your old heating oil tank, trust the professionals who know home heating best. From inspection to disposal, HOP Energy makes the process simple, safe, and compliant with local environmental standards.

Contact your local HOP Energy office today to schedule an estimate or learn more about our oil tank removal and replacement services.

Dear HOP: Your Home Comfort Questions Answered

Introducing Dear HOP — a candid look at the real questions our customers ask us every day and the honest answers they get from our trusted HOP Energy team. From fuel delivery to home comfort tips, this article offers practical advice based on real conversations, helping you stay informed, prepared, and comfortable all year long.

Q: What kind of financing does HOP have for a new AC or mini-split system? I need a new one and I'm not sure I can hold out until end of summer, but money is a bit tight.

A: HOP Energy offers a variety of flexible financing options and payment plans for ALL our equipment, including new AC and mini-split systems, so you can get the comfort you need without delay. Our team can walk you through payment plans that fit your budget, including zero-down and low monthly payment options for qualified customers. We recommend speaking directly with one of our knowledgeable reps, who will review your home’s needs, explain your system choices, and guide you through the financing options that work best for you. Let’s schedule a free in-home or phone consultation to get you started whenever you’re ready.

Q: I have an AC window unit now, but it’s loud and getting old and expensive. A friend recommended I replace it with a mini-split, but don’t know a lot about them. Are they a good choice?

A: Great question, and you’re definitely not alone in thinking about switching! Many homeowners are switching from old, noisy window units to modern mini-split systems because they’re much quieter, more energy-efficient, and can cool or heat specific rooms effectively. They also free up your windows, look cleaner inside your home, and help lower energy costs while keeping you comfortable. Best of all, you won’t have to go through the hassle of installing and removing your AC unit every year—mini-splits stay in place and work year-round. Plus, many of our models provide heating, giving you year-round comfort all in one system. One of our reps would be happy to take a look at your home and walk you through how a mini-split could work for your space, including system options and financing if needed.

Q: Is summertime a good time to stock up on heating oil? I don't need it right now, but are prices cheaper during summer?

A: Many customers in the Northeast do choose to stock up on heating oil during the summer because prices often tend to be lower when demand is down. While prices can still fluctuate based on market conditions, topping off your tank in the off-season can help you be prepared for fall and winter before the rush, while potentially saving on your cost per gallon. Plus, it’s one less thing to worry about when the cold weather returns!

About HOP Energy

HOP Energy is a trusted, full-service energy provider serving homes and businesses across the Northeast with reliable heating oil delivery, propane, and expert HVAC services. With a focus on local service, energy efficiency, and customer comfort, HOP Energy is here to help you stay warm, comfortable, and prepared all year long.

How Global Oil Trends Impact Your Winter Heating Bill—And What You Can Do Now

Every winter, thousands of homeowners ask the same question: Why is my heating bill so high?

The answer is often bigger than your home, your town, or even your state. It starts on the other side of the world, with events and decisions that may seem far removed from your daily life—but they have a direct line to your fuel tank.

Regardless of where you’re heating with oil in the North East, it’s important to understand how global energy markets can shape your costs—and how you can take smart steps now, in summer, to protect yourself from winter’s price swings.

Table of Contents

From Global Conflicts to Your Thermostat: The Journey of Oil Prices

Oil is a global commodity, meaning it’s traded on an international scale. Events like wars, political instability, production cuts by OPEC nations, and even shipping delays in places like the Suez Canal can disrupt the flow of oil and push prices up fast.

Even if your home’s heating oil is refined right here in the U.S., it’s still priced against the global market. That’s why you sometimes see a price spike at home even when nothing has changed in your neighborhood.

In 2023, for example, supply shocks caused by the war in Ukraine and inflationary pressures around the world led to unprecedented volatility in energy markets. Homeowners who weren’t locked into a heating oil plan saw their costs rise dramatically—sometimes with just a week’s notice.

Why Summer is More Often the Smartest Time to Protect Heating Fuel Price

Here’s something many homeowners don’t realize heating oil prices are often lower in the summer. Demand drops off in warmer months, giving suppliers more flexibility—and homeowners more opportunity.

By securing your rate now, you’re getting ahead of potential fall and winter spikes. Think of it as booking a flight early waiting until peak season usually means paying more, not less.

Typically, Hop Energy customers who take advantage of summer pricing not only save money—they enjoy peace of mind, knowing their rate is protected, no matter what happens in the global market.

Capped Pricing + Downside Protection = Security

At Hop Energy, we offer more than just oil—we offer stability. With our capped pricing plans, you lock in a maximum cost per gallon, but you still get the benefit of lower market prices if they drop. It’s the best of both worlds:

  • If prices spike, your cap protects you
  • If prices fall, you pay the lower amount
  • If nothing changes, you have budget predictability

It’s a strategy built for real-world uncertainty—and it’s available to you right now.

What You Can Do Today

Here’s the bottom line: you don’t have to wait until temperatures drop to start thinking about your heating bill. In fact, waiting could cost you.

By acting now—when prices are often lower and plans are open—you give yourself control. That means:

  • Locking in a capped or fixed rate
  • Reducing stress when winter hits
  • Avoiding last-minute price surges when demand peaks

HOP Energy can help you choose the plan that works best for your home, your usage, and your budget.

Spend Time With Your Thermostat… Spend Less on Fuel

It doesn’t cost you a single penny to change the setting on your thermostat. But turning your thermostat down can definitely save you money. And, you don’t have to be cold, either. Managing your thermostat effectively in the winter can significantly reduce fuel usage and heating expenses while maintaining comfort. Here’s the best approach:

Table of Contents

1. Set an Optimal Temperature

Daytime: Aim for a comfortable range, typically 68°F (20°C) when you’re home and active.

Nighttime or Away: Lower it by 7–10°F, ideally to 60–62°F, while sleeping or when the house is unoccupied. This can save up to 10% on heating costs annually.

2. Use a Programmable or Smart Thermostat

Set schedules that automatically adjust the temperature based on your routine.
Smart thermostats can learn your preferences and even adjust settings based on the weather.

3. Zone Heating

If your home has multiple heating zones, heat only the rooms you’re using and keep doors closed to conserve heat in those areas.

4. Leverage Passive Heating

Open curtains during the day to let sunlight naturally warm your home. Close them at night to insulate windows.

5. Avoid Overcompensating

Don’t set your thermostat higher than necessary thinking it will heat the house faster; most systems warm at the same rate.

6. Regular Maintenance

Ensure your heating system is clean and efficient. Replace filters regularly and have the system inspected annually.

7. Seal and Insulate

Reduce drafts by sealing windows and doors and adding insulation. This minimizes heat loss and keeps your thermostat setting more effective.

By adopting these strategies, you can find a balance between comfort and fuel efficiency.

As a reminder… to get the most value from the heating oil, you should schedule an annual tune-up of your heating system. Having your system tuned up will ensure that it is running properly and at peak efficiency. That can mean reduction in fuel usage by 5% or more, equivalent to saving 35 gallons of heating fuel oil annually for a typical home in the northeast. The best time to schedule this important job is during the spring and summer. Once the temperatures begin to turn cold in the fall, many dealers become very busy keeping you supplied with heating fuel.